Install and manage a node on Windows#
This article explains how to run a Concordium node on Windows on mainnet or testnet, and how to set up your node as a validator node.
An account is not required to run a node, but you will need one if you want to become a validator.
You can also watch the video to learn how to run a node with Windows OS.
Prerequisites#
Run Windows 10 or later or Windows Server 2019 or later.
The server must be running around the clock.
Meet the minimum system requirements for running a node.
Installing and running Concordium node on Windows#
The node installer allows you to run both mainnet and testnet nodes—you do not need to download a separate installer for each network. You will be able to choose the desired network(s) during the installation process, as described below.
Download the latest
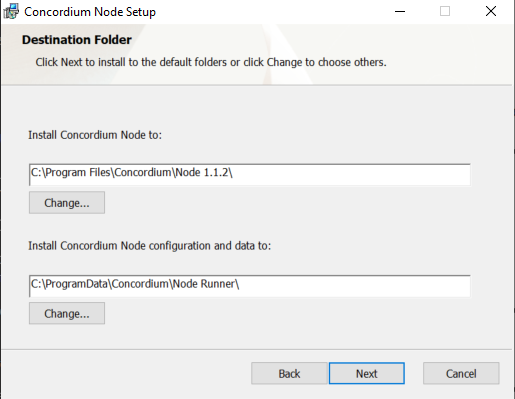
.msiinstaller from the Downloads page, and run it to launch the setup. If prompted with Windows protected your PC, select More info and Run anyway.Accept the End-User License Agreement and select Next; on the following step, specify the Destination folders:
In Install Concordium Node to, specify where to store the executable code.
In Install Concordium Node configuration and data to, specify where to store the node configuration and the blockchain databases and logs. Choose a drive that has sufficient space to accommodate the database and is sufficiently fast.
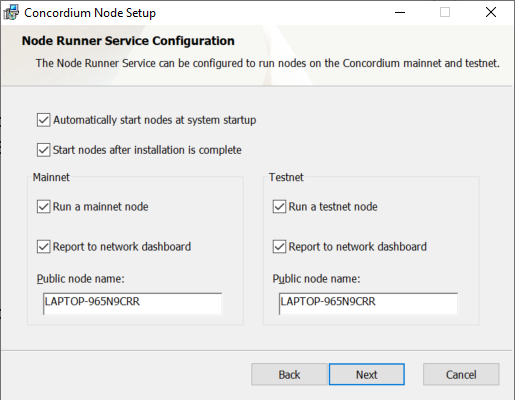
The next step is to configure the Node Runner Service. By default, the service is configured as follows:
Automatically start the mainnet node at system startup
Start the mainnet node right after installation is complete
Run the mainnet node only
Report to the network dashboard
Use your computer’s name as the public node name
If you agree with the default settings, click Next to continue. For manual configuration, expand the drop-down below:
Node Runner Service configuration
Automatically start nodes at system startup: When selected, the node runs when the system starts. Choose this option when you plan to use the node frequently and need it to be up-to-date at short notice. If you don’t select this option, you’ll have to start the node manually when required, for example, when you want to use the Desktop Wallet or Concordium Client. If you choose to start the node manually, it might take longer for the node to get up-to-date with the blockchain depending on when the node was last up-to-date.
Start nodes after installation is complete: The node will automatically start running after the installation is complete. Do not choose this option if you want to make further configuration changes before starting the node.
Mainnet or Testnet: Mainnet is the Concordium production blockchain where actual transactions occur, whereas testnet is for test and development. Select your preferred network for running the node: Run a mainnet node or Run a testnet node. You can run a node on just the mainnet or the testnet, or run nodes on both at the same time.
Report to the network dashboard: Select this option if you want to publish your node statistics to the relevant dashboard when the node is running. Go to the mainnet or testnet dashboard to view the statistics:
Public node name: Specify the name of your node as you want it to appear on the network dashboard if the node reports to the network dashboard.
Select Next, and then select Install to begin the installation. The Concordium Node is installed. If you see a message saying Do you want this app from an unknown publisher to make changes to your device?, select Yes. This message appears because the installation requires administrative permissions. If you’re not logged in with an administrative account, you’ll have to provide credentials for an administrator account to continue the installation.
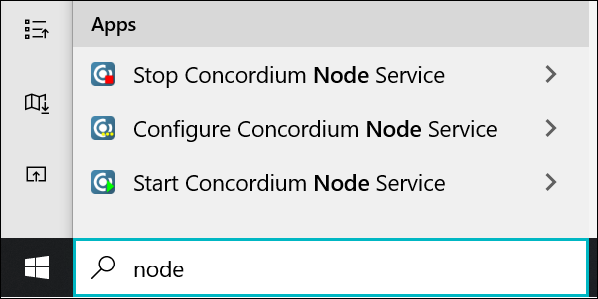
Select Finish to complete the installation. The following shortcuts are now available from the Start menu:
Start Concordium Node Service: Starts the node
Stop Concordium Node Service: Stops the node
Configure Concordium Node Service: Opens the configuration file.
Third Party Licenses: Shows the licenses the third party components are distributed under.
Upgrading Concordium node version on Windows#
Note
When upgrading your Concordium node, it is generally possible to upgrade directly to the latest version without upgrading through each intermediate version. However, if you wish to download previous node versions, see Previous node versions.
To upgrade your Concordium node on Windows, download the latest .msi installer from the Downloads page and run it.
When upgrading Concordium Node on Windows, be aware that the installer will overwrite your existing node configuration file.
If you have made any custom changes to your configuration, be sure to read the important notes below before proceeding.
If you have done special configuration of your node, you may want to back up the service config file prior to upgrade, then replace the new one with your backup. This file is typically located at
C:\ProgramData\Concordium\Node Runner\nodes.toml.(The path on your system is determined by theConfigvalue in the registry keyHKEY_LOCAL_MACHINE\SOFTWARE\Concordium\Node Runner.) Or you can re-enter your values after upgrading. See Concordium Windows node runner service configuration for information about how to change the service configuration settings.It is a good idea to stop the node before running the installer for the new version so that you do not need to restart your computer. To do this, click on the Start menu and search for Stop Concordium Node Service.
Uninstall Concordium node on Windows#
In the Search bar, enter add, and then select Add or Remove Programs.
Under Apps & features, search for Concordium, and then select Concordium Node.
Select Modify, and then in the Node Setup Wizard select Next.
Select Remove. If you plan to remove the node permanently, select Remove node data folder to remove all files and subfolders in the folder. Don’t select this option if you are only removing the node to perform an upgrade or otherwise want to keep the data, logs, or any other files in the data folder.
Select Next, and then select Remove.
If the service is running, when you uninstall it you’ll see a message saying that the system has to restart to update files and services. Select OK. (If the service is not running, you’ll not see this message). If you see a message saying Do you want to allow this app from an unknown publisher to make changes to your device?, select Yes.
Select Finish, to complete the removal of the Concordium node.
To verify that the node has been removed, in the Search bar, enter task manager, and then select the Task Manager.
Go to the Details tab and verify that node-collector.exe has been removed from the list, and then go to the Services tab and verify that ConcordiumNode has been removed from the list.
Run a validator node on Windows#
For information about validation on a Windows node, see Import validator keys.
